Showing posts with label ham. Show all posts

Tuesday, December 27, 2011

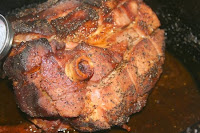
Deconstructed Jambalaya Ham in a Dutch Oven


My father-in-law bought us a ham for Christmas dinner, and I was contemplating how to make it.  I’ve got a lot of ham recipes already, and I was tempted to just do one of those again.  But, I also thought about doing it differently.

To get some ideas, I browsed the web.  As I was doing a search, I saw a recipe for a jambalaya with ham chunks in it.  I looked it over, and thought I could deconstruct it.

“Deconstruction” is an interesting process that has gotten a lot of attention in the food world in the last few years.  The idea is that you begin with an idea for a well-known dish, then in your mind you separate out the ingredients one from another.  Then, you create a new dish, using those same ingredients in new and recombined ways.

In this case, the thought was to roast the ham with all the herbs and seasonings flavoring it.  Then, to combine all of the veggie ingredients around the ham, and to use the veggies and liquids as a baste to flavor the ham roast.

I was a bit nervous to do it.  My father-in-law is a very traditional eater, and I wasn’t sure how he’d go for it, and my wife was even less convinced when I explained what I’d be doing.  I decided to go ahead with it anyway.


Deconstructed Jambalaya Ham

14” Dutch oven

18 coals below
18 coals above


  • 1 8 lb ham, thawed
  • Liberal shakes of:
  • Salt 
  • Pepper
  • parsley
  • thyme
  • basil
  • bay leaves
  • Paprika
  • Cayenne (not as much, to taste)


  • 3 medium onions, diced
  • 3 sweet peppers
  • 4 med tomatoes, diced
  • 3 stalks of celery, chopped
  • 5 cloves garlic, coarsely chopped


I started out with the thawed ham (which was a spiral cut, pre-cooked).  I cut it out of the package and put it into the 14” Dutch oven without letting it drain, to keep as much of the liquid as possible.  I mixed all of the seasonings in a bowl and mixed them up, then rubbed them all over the ham.  I put that onto the coals.

I waited only about a half hour to begin chopping up and prepping the veggies.  When they were all ready, I tossed them in around the ham.

I made sure that I had plenty of fresh coals ready to keep coming in from time to time from the side fire.

When the veggies had been in for a half hour or so, I began scooping the cooking veggies and liquids up and spooning it over the ham about every twenty minutes or so.  I also started thinking about a side dish.  I had the bread sculpture from the other day, and some salad, but I wanted a bit more variety.  I thought about doing some roasted seasoned potatoes.

Simple Dutch Oven Roasted Potatoes

10” Dutch oven

10 coals below
10-12 coals above


  • 4 large Potatoes
  • olive oil
  • salt 
  • pepper
  • paprika


I chopping up the potatoes, thin.  I poured the olive oil on them in the 10” Dutch oven, and added the seasonings.  I stirred it up well, and put it on the coals.

From then on, it was easy.  I just monitored the coals, and the temperature of the ham, and got it on the table when it was done.  The roast cooked for a total of about 2 ½ hours.

The verdict?  I loved it, my wife loved it, and even my father-in-law asked to take some home!


share

Mark has discovered a love of Dutch Oven Cooking. Mark also has other sites and blogs, including MarkHansenMusic.com and his MoBoy blog.

Thursday, November 24, 2011

Apple Orange Ham - My Dutch Oven Challenge Entry


I actually tried to make a dish for my Apples to Oranges Dutch Oven Challenge about three weeks ago or so, but it didn’t turn out very well.  It wasn’t BAD, but it wasn’t what I wanted, and it certainly wasn’t as cool as some of the other entries.  I did a pan-fried ham steak with an attempt at an orange/apple glaze.  In the end it was good, but not great.

Well, for our big family Thanksgiving dinner this week (today, actually), I was asked to do a ham.  An idea started forming, so I gave it a shot.  It turned out to be really, really yummy.  It did have several steps to the process, but it was overall pretty easy.  The spices played pretty nicely together.  I did stick with pretty much the sweet end of the spice spectrum, though.  I didn't get to crossover-crazy with the savories.

Apple Orange Ham

14” Dutch Oven

14-16 coals below
16-18 coals above


  • 1 Spiral-sliced, pre-cooked ham, thawed
  • 2 Apples, sliced
  • Cloves, whole or ground


  • 1 large can Mandarin oranges with syrup
  • 1/2 can orange juice concentrate
  • 1 apple, minced
  • Zest of 1 orange
  • ½ tsp Cinnamon
  • ½ tsp Nutmeg
  • ½ tsp Fennell
  • 1 ½ cup Brown sugar
  • Minced fresh mint


I started out by lighting up some coals.  I got one of my big 14” deep dutch ovens out and oiled it inside and out.  I put that on a lot of coals, with some on the lid as well, to preheat, and to set some of the seasoning on the patina.

While the Dutch oven was heating up, I cut up the apples.  I sliced them very thin.  I didn’t have any whole cloves, so I just sprinkled some ground cloves onto the apple slices and stirred them up really well.

The ham had been thawing in the fridge for almost a week.  I cut open the bag and drained it, then put the ham on a plate on the counter, lying on its side.   I inserted the apple slices into the spiral slices of the ham.  If I had been using whole cloves, I would have inserted them as well.  I kinda staggered them from layer to layer.  That kept it from bulging out too much.  I did that on both sides, then put it in the dutch oven to cook.

I cooked it for about two hours.  After about an hour, I made the glaze.  I basically just mixed the ingredients.  It wasn’t as thick as I wanted it to be, but it still worked.

I did try something new.  The nutmeg was whole, and freshly grated, and the fennel was ground in my mortar and pestle.  The smell of the nutmeg as I was grating it was in-cred-ible.

So, I just basted about ¾ of the sauce/glaze onto the top of the ham in the last 45 minutes or so of the roasting and let it settle in.  About 15 minutes before taking it off the coals, I put the last of the sauce on.

When it was all done, it tasted delicious.  I could taste all of the flavors intermingling.  I also made a loaf of spice bread, and added some dried cranberries.  that was really delicious, too, and both dishes were a hit with the family.


share

Mark has discovered a love of Dutch Oven Cooking. Mark also has other sites and blogs, including MarkHansenMusic.com and his MoBoy blog.

Wednesday, June 15, 2011

Dutch Oven Split Pea Soup in a Bread Bowl, Part II

I love making split pea soup. It’s got to be the ultimate comfort food. For me, as a dutch oven cook, it’s especially cool because I usually do it the day or the week after I made a big, huge, delicious bone-in ham. The bone usually still has a lot of meat attached to it, and that meat and the bone is steeped in the spices and flavorings that I used on the ham. So, each time I make the soup, it’s completely unique.

As I mentioned before, this time, Brendon had the brilliant idea of putting the soup in the bread boules I was making that morning. You could use just about any bread flavor, but this time, the Italian bread was perfect. It’s got a little sweet from the sugar, but not very much. Most of the flavor is from the flour itself, added to the savory tang of the ham and the split pea soup. Amazing!

I used the same soup recipe I always use, which you can find here.

The end result is a delicious, rich, and even elegant meal.


share


Mark has discovered a love of Dutch Oven Cooking. Mark also has other sites and blogs, including MarkHansenMusic.com and his MoBoy blog.

Monday, May 10, 2010

Dutch Oven Split-pea Soup With Ham

This weekend, I was doing a lot of yard work, even on sunday.  I know, I know, it's supposed to be a day of rest.  Oh, well.

So, even though I'm working in the garden, I still wanted to cook.  I wanted something simple and easy, a two-step, one-pot meal.  I'd found, buried in the freezer, an old ham bone from one of my past dutch oven roasting days.  Time for split-pea soup!

I had done split-peas many times before.  This recipe for Dutch Oven Split-Pea soup is the first time, and this one has been the basis for all of them.  It's good, but this time I kicked it up a notch.  It must've worked, because even though I cooked up a whole 12" dutch oven worth of the stuff, there were no leftovers.  That's good, too, because split-pea doesn't usually make great leftovers. It ends up as less of a soup and more of a paste.

I've found, by the way, that when you do these recipes, your final result will vary a little based on the way you cooked your ham.  Some of the residual flavors and spices from the ham will carry over into the soup.  I, personally, like that.  It gives a little variety.  The same is true if you make your own chicken stock.

Anyway, since I really dressed up this recipe, I'm going to rewrite it here, rather than just linking back.

Dutch Oven Split-pea Soup with Ham

12" Dutch Oven
15-20 coals below

  • 1 sliced onion
  • 4-5 cloves of garlic, minced
  • 2 stalks chopped celery
  • 6 cups water, at least half of which could be chicken stock
  • 1 lb bag of dried split peas
  • 1 ham bone with lots of meat left on it.
  • 1 diced potato
  • Generous shakes of oregano, parsley, and chili powder
  • salt and coarse ground pepper to taste

I started by lighting up some coals and letting them start to get white.  I put about a tbsp of olive oil in the bottom of my dutch oven, and let that heat up.  I chopped up the veggies while it was all getting going.

Once the oil was hot, I dropped in the onion, the garlic, and the celery to sautee.  Remember, if it's hot enough, they'll sizzle as soon as you drop them in.  I stirred them up and salted them a little.  The dutch oven was plenty hot, and pretty soon they were browning.

Once the garlic was brown and the onions were translucent, I poured in the liquid.  I used a bullion powder to make it all chicken stock.  I didn't have any of my homemade stock left.  Bummer... 

Then I added all of the other set two ingredients, and let it come back up to a boil. 

Once it was simmering, I started adding in the herbs and the chili powder.  I added the chili powder a bit at a time.  I'd shake in some, let it simmer for 15 minutes or so, then taste. Add some more, wait, and taste.  I wanted it to have an edge, but I didn't want to have a recognizable chili taste.  In the end, I probably added a little under a teaspoonful. Season with salt and pepper to taste, but be a little cautious, because the ham will add lots of salty flavor already.

It turned out great!  We all gathered around our new patio table, and had a wonderful outdoor meal.  If you try this one, let me know how it goes!


share


Mark has discovered a love of Dutch Oven Cooking. Mark also has other sites and blogs, including MarkHansenMusic.com and his MoBoy blog.


Friday, January 1, 2010

Christmas Eve Dinner in the Dutch Ovens, Part II


For a long time, it was a Christmas tradition of mine to make some wassail and take it to work.  That really doesn't work out very well at my new job, however, so I haven't done it in a couple of years.  Still, I like the flavors and the aroma of cinnamon, apple, and orange.

So, when Jodi said that her step-dad was coming over for dinner on Christmas Eve, and that he'd bought us a ham to cook up, I started thinking about what I could do with it.  She suggested something with the oranges we have.  That triggered the idea:  I could do the wassail on the ham!

Dutch Oven Wassail Ham

14" dutch oven

8-9 coals below
16-18 coals above

  • Ham
  • 1 Orange, sliced
  • cloves

  • 1/2 can orange juice concentrate
  • 1/2 can apple juice concentrate
  • 1/2 cup honey
  • cinnamon
  • Orange zest
Universal Housewares Pre-Seasoned Cast Iron Camping Dutch Oven
My original intent was to cook this ham low and slow.  The ham itself was pre-cooked, so I would only need to bring it up to temperature with my flavorings, rather than actually cook the meat.  I wanted to set up my ovens to cook at about 250 degrees (F), but I'm not sure that I actually pulled that off.

First of all, this was also a pre-sliced ham, so it was easy to put the cloves in the slots of the slices.  If it hadn't been pre-sliced, I would have cut the traditional diamond angle slashes in the top and inserted the cloves into those cuts.

I put the ham into the dutch oven, for starters.  I sliced up an orange into thin rings, and laid those on top of the ham.  The ones that were on more slopey sides, I secured with a half-toothpick.  With that little bit of preparation, I put the oven on the coals, listed above.  If I could have found my small oven thermometer, I would have put that in the bottom of the dutch oven, to monitor the surrounding air temperature.  I still think that in most conditions, those coal counts will be pretty accurate.  It was cold out, so that threw off my estimates.

After about an hour, I made the glaze from the second set of ingredients.  I put them all in an 8" dutch oven and put that on some coals so that it would reduce.  It did some, but I would have liked it to get thicker.  Still, I poured that over the ham.

From then on, I would check the internal temperature of the ham about ever half hour to 45 minutes or so, and, with a basting syringe, reapply the glaze.  It took about 2-3 hours, total.  I brought it up to 140 degrees, even though I'd heard that 120 is sufficient.  It didn't turn out dry, so I was pleased.


It was delicious, and it captured that wassail flavor.  I think next time, I'll go a little heavier on the cinnamon, and watch the heat on the oven better, to keep it closer to 250.

Next: Part III of the Christmas Dinner:  The Bread

EXTRA: I got contacted by a new dutch oven blogger!  Her site is http://dutchovenmadness.blogspot.com/.  She says she wants to cook in her dutch oven every day in 2010.  I'm looking forward to her recipes and experiences.

Mark has discovered a love of Dutch Oven Cooking. Mark also has other sites and blogs, including MarkHansenMusic.com and his MoBoy blog.

Monday, June 29, 2009

Dutch Oven Ham Recipes, Part III

I'm a big fan of ham. I think that I can enjoy a good ham as much as a good steak. Like the chicken and turkeys, there are a lot of ways that ham can be done and used, and you could go on and on with more and more ham recipes.

I've done a couple of really good ones here in the last week, that I'm particularly pleased with, and as I've gone back through the annals of the Black Pot, I've re-discovered quite a few more.

Let me share those with you!

Dutch Oven Ham Recipes - Roasts

  1. Christmas Wassail Ham
  2. Spicy Ham Roast
  3. Orange Ham
  4. Ham with Honey Mustard Glaze
  5. Byron's Dr Pepper Ham


Dutch Oven Ham Recipes - Soups and other things

  1. Ham and Black-Eyed-Pea Soup
  2. Split Pea Soup

I'm sure there will be lots more to come in the posts that follow! Check in often and see!

Sunday, June 28, 2009

Dutch Oven Ham Recipes, Part II

Every time I do up a big ham, I always save the bone. Usually, I make split pea soup with it, but this time, I decided to try something new, slightly. I decided to do a black-eyed-pea soup. This recipe is a variant from something I found online at recipezaar.com.

One of the big changes I made was the orange juice. This ham soup recipe originally called for Sherry. I looked up some alcohol substitution charts online, and they all suggested orange juice for sherry. Having never tasted sherry, I don't know if that's a fair replacement. Still, it tasted good!

Other than soaking the beans, there's really not much to this dish. So, this one is also really good as a beginner dish, since it's really just a dump it in and cook it kinda meal.

Dutch Oven Ham and Black-Eyed Pea Soup


12" Dutch Oven
~15 coals below

  • 1 lb black-eyed peas
  • 3 Cups water
  • 4 Cups chicken stock
  • 1/2 cup orange juice
  • 1 ham bone, with a lot of meat still on
  • 1 medium onion, diced
  • 4-5 stalks celery, chopped
  • 1 bay leaf, crushed
  • 2 garlic cloves, minced
  • ~1/4 cup chopped fresh parsley
  • 1-2 tsp chili powder
  • salt & freshly ground black pepper, to taste
  • A little flour to thicken, if desired

Like I said before, there's really not much to this ham recipe. The night before, I opened up the package of beans and put them in a bowl with lots of water. You need to do lots because the whole point is to have the beans soak it up. So, put in an inch plus or so of water higher than the beans.

The next day, drain the beans, and drop them into a dutch oven. Pour in the liquids, and drop in everything else. Because there's a lot of water, I used a lot of salt. It was very very yummy, especially with the french bread!

Monday, June 22, 2009

Dutch Oven Ham Recipes, Part I

Yesterday, I had another one of those dutch oven cooking days where everything went right. It was truly a five star meal, or at least four stars!

The centerpiece of the meal was a dutch oven ham recipe that was actually done pretty simply, with just a few ingredients. Basically, it's a honey and brown sugar glaze. I'd seen some recipes that used this particular approach, but I took it in a slightly different direction.

At first, I thought I'd flavor it up a bit with maybe some apple juice or dried apples, and cinnamon and nutmeg. But then, I decided that was going to be too obvious, and I should shake things up a bit. So, I ended up going with a chili powder in the mix.

That worked really well, because you get this three-layered flavor thing happening. When you bit into it, especially a cut with a glazed edge, you got the sweet, sweet sugar first, and then a few moments later, a bit of heat. Finally the salt of the ham meat itself came through.

Yummmmmmy.

Dutch Oven Honey Spicy Ham

Deep Dutch Oven, 12" or 14", depending on the size of your ham

12": 25-28 coals, split evenly between above and below
14": 30-33 coals, split evenly between above and below


  • 2 Cup Brown Sugar
  • 2 Tbsp Salt
  • 1+ Tbsp Pepper
  • 1-2 tsp Chili Powder

  • 1 uncooked ham, thawed
  • 3-6 ounces of honey


That's it, really. Not much to it, is there? I kept thinking, "Wait, this is too simple. What else should I put in there?" But I couldn't think of anything else that it needed, or that would really enhance it. Simple is good, it seems, especially in ham recipes.

I started off making the rub. This is also simple. I just mixed the ingredients into a small bowl and stirred them together with a fork. Now, your chili powder my be weaker or stronger than mine, so taste the whole mix and see how it balances. Then you can adjust the pepper and the chili so it's there, but not too strong.

How much of this you use is going to depend a lot on the size of your ham. I actually ended up doubling this one because I was baking a 10 pound ham. Use these same approximate proportions and just make it to your taste.

Put the ham in the dutch oven and make sure that you can close the lid over it. Depending on the size and shape, you might have to position it differently, or, as I did yesterday, have to cut a chunk off. I have honey in one of those squeeze bottles, so I drizzled it all over the ham. Using a basting brush, I spread it out, especially on the sides.

Then I took the rub and smeared it all over the ham, letting it adhere to the sides with the honey. I let that sit for ten to twenty minutes and absorb into the meat a bit.

I put it on the coals, and from that point on, it was simply a matter of managing the heat from the coals and occasionally using a baster to pick up the juicy syrup and respread it onto the ham. I also had some sugar mix left over, so after a couple of hours, I also dusted that back on top for some more glazing.

It cooked for about three hours total, to an internal temperature of 160 or so. At that point I took it off the coals and brought it in to the table. By the time we were all gathered, it had risen up to about 170.

My family pronounced this dutch oven ham recipe delicious!

Along the way, I also made some french bread for the first time, and also did au gratin potatoes that didn't break! I'll add those recipes later.

Sunday, March 23, 2008

Is Cooking an Art?

I've talked before, on other blogs about what makes a work "art". I've said that then experiencing art, it makes me think or feel something new, or in a new way.

But that's always been from the point of view of the viewer, the consumer of the work. What about from the perspective of the artist? What defines "art" then? And does cooking fit that definition?

Well, art, from the artists point of view, would have to come from something new. To simply follow a recipe, a formula, or a pre-made pattern wouldn't be art.

It would have to come from somewhere inside me, to help me discover something new about myself. It would have to allow me to express.

And, finally, it would have to connect with an audience, a consumer, in some way. And I think it would be "more artistic" if it connected on a deeper level than "Oh, that's nice", or even, "That sure tastes good!"

So, yes, I think that cooking can qualify on those three levels. It certainly doesn't always. I do like to modify recipes, and to even create new ones. I don't know that anything that I've ever cooked in my dutch oven has ever caused a new thought or an inspiration. But it is something I can aspire to.

Anyway, if it IS an art form, it strikes me as interesting. It would be one of the few art forms where enjoying the art in it's fullest way involves destroying it.

Also, it would be one of the few art forms that would have evolved from something that is fundamentally essential for survival, eating. Granted, food doesn't have to be artistically prepared to provide nourishment, but then, you don't need the theater, or paintings on your wall to survive, either.

Oh, well, enough musings.

Today, being Easter Sunday, we always have lots of family and friends over, so that usually means I cook. Traditionally (as of last year), I do a big ham in the 14” dutch oven. Last year, I did the Dr Pepper ham with all kinds of fruit and veggies in it for flavoring. It was great. But, of course, I wasn’t writing here in the Black Pot back then, so my dutch oven efforts for that year went unblogged.

*sigh*

This time I did it a little different. I used the recipe below for the baste/glaze/sauce. It worked out great! It was kind of an experiment.

Orange Dutch oven Ham

14” deep dutch oven
17-18 coals each above and below.

  • 10-11 lb bone-in ham
  • Whole Cloves
  • 1 cup brown sugar
  • 2 Tbsp mustard seeds (or dry mustard)
  • 1 Tbsp Allspice
  • Salt
  • Black Pepper
  • Zest from 1 orange
  • Slices from 1 orange
  • Juice from 4 oranges

First of all, I put the ham in the dutch oven. I had to slice a bit off here or there to make it fit. I slit diagonal cuts in the top of the ham. That helps the baste and the glaze seep down into the ham more. The cloves I stuck in the slots. Then, I mixed all of the remaining ingredients from the second set of the list and rubbed those over the ham.

Then, I sliced up the orange that I had zested and laid those slices on top of the sugar/spice mix on the ham. If I do this one again, I would anchor those orange slices in place with toothpicks, because they kept falling off the ham into the dutch oven in cooking.

Finally, I juiced up a bunch of oranges and poured that on top of the meat. Pour it slowly, more like sprinkling it. Because I found that if you pour it quickly, you wash all that sugar and spice off the ham, and you have more work basting the meat!

Then, put it on the coals and let it cook. I let it cook for about 3 hours. Make sure you keep your coals fresh and hot. This was the first time I used a meat thermometer in dutch oven cooking. I strongly recommend it. It was so much easier to tell when it was done. 160 degrees! When you get there, you’re good! They say a pre-cookd ham you can call good at 140 degrees internal temperature.

Then, I also made Au Gratin Potatoes and Rolls (this time I dusted them with salad seasoning, garlic powder, and parmesan cheese. They were yummy, even with jam!

PS. For those of you who wonder why I never finished writing part II of the Great St Patrick's Day adventure, let me tell you. It was a total flop. Crash and burn. Honestly. The corned beef and cabbage turned out too salty to eat, and the Irish soda bread turned out to be a brick. It was embarrassing. I'm so grateful nobody came over for dinner that night.

It was the first time I ever had to throw away anything I'd made in the dutch oven. It was truly inedible. There have been times when it's not been that good. There have been times when we didn't eat it all, and we ended up throwing away some leftovers. But there has only been one time that we threw it all out because it couldn't be eaten. That was this last week.

But that's OK. These things happen, and I learn from them. It was just kinda tough, especially after seeing all those incr-edible chefs at the world championship.

But I'm good with that now. Today came out really well. A big 4-pot meal, and it was delicious! I'm back in the saddle!

Tuesday, December 18, 2007

Dutch Oven Soda Pop Biscuits and Split Pea Soup

Since I’d made ham a few weeks ago, I had to follow up, of course, by cooking the bone in a split pea soup. I did basically the same recipe as I’d done last time. Except this time I used a lot more coals (it was cold out), and I also added a lot more of the herbs.

This time I tried a different biscuit recipe, though. It was kinda cool. It uses soda pop instead of baking soda. An interesting twist…

Dutch Oven Soda Pop Biscuits

12” Dutch Oven

17 coals above
8 coals below

This time, however, since it’s winter, I used 19 above and 11 below.

  • 3 cups flour
  • 3/8 cup oil
  • 12 oz (one can) soda pop. I used 7-up, and not the diet stuff, either.
  • 3 Tbsp Baking powder

It was pretty simple. First, I got some coals hot, and I put them on and below the empty oven, to pre-heat it. My sister, an accomplished cook, had told me that biscuits and things that do chemical leavening (as opposed to yeasts) need to have a preheated oven. So, I tried it.

Then, I just mixed the ingredients in a bowl and stirred. It ended up being a little sticky, so I sprinkled in a little more flour. It was so light and airy, that I didn’t have to roll it out, I could just spread it out with my hands on the floured tabletop. I spread it to about 3/4" thick, and cut it with a drinking cup.

Then I took them outside and put them in the heated oven, and started the baking. After about a half hour to fourty minutes, I took it off the bottom coals, but left the coals on the lid, so the tops would brown without burning the bottoms.

Unfortunately, my timing was really bad. Because just as the soup was finishing, I had to get the boys ready to go to a birthday party, so I didn’t get to taste the soup until a couple of hours later. It was delicious, however, as were the biscuits!

Sunday, December 9, 2007

The Best Dutch Oven Ham EVARR

OK, well, at least it was the best Dutch Oven Ham I'VE ever made.

See, my Thanksgiving ham was great, but it wasn’t what I’d expected it to be in the end. The “glaze” mixed with the liquid that cooked out of the ham, and (since it was pretty runny to begin with) ended up more like a baste. It tasted great, but it wasn’t quite what I was looking for.

So, I did it again tonight. I had some ham left over (remember I had to cut it up because it wouldn’t fit into my deep 12” Dutch oven?).

This time, I mixed the glaze to be more, well, glaze-y. More like a thick sauce or almost a paste. Another thing I did was let the ham cook a little bit to open up the slits I carved in the top. That way, when I put the glaze on, it would stay more in the meat, and not so much on the bottom of the dutch oven.

I also cooked it a bit hotter. This was primarily because it was cold out, but I think that browned and crisped the top much better.

Anyway, here it is.

Mark’s Honey Mustard Ham in the Dutch Oven

12” shallow Dutch Oven

14-15 coals above and below

  • 1 ham, not so big, maybe 3 lbs or so
  • Quite a few whole cloves
  • 1/4 cup soy sauce
  • ~ 1/3 cup mustard
  • ~ 1/2 cup honey
  • Liberal shakes of:
    • Grated Parmesan Cheese
    • Coarse ground black pepper
    • Celery salt
    • Chopped, dried parsley

First, fire up some coals, and let them get white and hot.

I started by putting the ham in the dutch oven and checking to see that it was below the lid. Then I sliced the diagonals across the top, and put the cloves into the slices.

Once the coals were ready, I put the ham on.

Mixing the sauce was a bit tricky. I started with the soy sauce, and kept adding mustard and honey and stirring until it was thick. I went much heavier on the honey, but I was also pretty liberal with the mustard. The amounts shown here are approximate. Then, add the spices. The parmesan also helped thicken it a little.

Since it was cold outside, it took quite a while for the oven to get warmed up and begin cooking the ham. Once the slices on the top started to open up, I poured on the sauce. Then, every twenty minutes or so, I’d open it up, scoop some sauce up and pour it back over the meat. I could see it stayed on a lot more, and it really seeped into the slices.

I’ll bet it cooked for about an hour to an hour and a half

While that was cooking, I made Creamy Potatoes and Peas, from this recipe (minus the bacon).

When it was all about 20 minutes from done, Brendon came out with a can of crescent rolls he wanted to cook, so we put another oven on the coals (actually, we stacked it on top of the ham oven), and baked those. It was a great meal. The peas and potatoes were great, but the ham was the star. Wow!

Friday, November 23, 2007

Thanksgiving Turkey and Ham in the Dutch Ovens

We had a lot of people in for Thanksgiving this year. It was our first Thanksgiving in the new house, and I think Jodi kinda wanted to show it off a bit. I guess technically, it was the second, but last year, we had only been in the house about a week. No time to set up for a party.

My sister and bro-in-law came out and I spent a good time talking with them. They are both excellent cooks, and gave me some good advice. One of the problems I have with biscuits and soda bread is that it doesn’t rise like I want it to. She said that non-yeast leavening should be put into a hot oven. I usually just put things into the oven and then put them on the coals. I didn’t realize it would make a difference. They also had some good advice about the balance of wet and dry in breads.

So, anyway.

You know, there are so many ways to do a turkey, and so many recipes it’s just amazing. I’ve been reading over on the dutch oven yahoogroup about all the ideas and methods and recipes, and it’s just amazing. While I’m giving thanks, I’ll give all my friends over there some good thanks for all their advice and help this last year.

I did the same herbal roast turkey that I did for Christmas last year, from Byron’s. I did it pretty much straight as he lists it. Still, I’ll include the recipe here. We also did one of that in the regular oven, because I could only fit a 13 lb turkey in my 14” Dutch oven. Then, in the 12” deep dutch oven, I did ham recipe of my own design. I’ll write the recipes up separate, even though I roasted them concurrently.

Byron’s Dutch Oven Herb Roasted Turkey

14” Deep dutch oven

15-18 coals on top
24-28 coals below

Turkey Stuffing

• 1 onion; quartered
• 3-4 slices bread (I used sourdough rye)
• 3 tbsp melted butter
• 12 bay leaf
• 2 Tsp minced garlic
• Salt
• Pepper (I like it coarse ground)

Turkey

• 13 lb. turkey
• 2 more Tsp minced garlic
• Salt
• 1 cup water

OK, I started out with the turkey, and began by mixing the stuffing ingredients and removing the neck and giblets, and various pouches that the company sticks in the turkey. I’d kept it in the fridge to thaw for the last few days, and took it out early in the morning. I wanted to have it on the coals by 10, to get it on the table by 2:30 or 3:00, including carving time. A 13 lb turkey isn’t going to have very much room for stuffing so I didn’t really do that much. But I stuffed it in the body cavity and set the turkey in the 14” dutch oven. Then I rubbed the additional minced garlic onto the body and sprinkled some salt over it. Then, I added a cup of water to the dutch oven, for steaming, and closed it up. I put that on the coals.

Basting Sauce

• 1/2 cup butter
• 1 tsp. dried mint leaves
• 1/2 tsp. dried thyme
• 1/2 tsp. dried sage
• 1/2 tsp. dried marjoram
• 1/2 tsp. sweet basil
• 1 tsp. celery salt
• 1 tsp. salt

In the 8” dutch oven, I combined all of the basting sauce ingredients, and simply set that on top of the turkey dutch oven lid, using those upper coals to melt the butter and simmer the sauce.

From then on, it was simply a matter of keeping the coals fresh and basting the turkey occasionally. The total cooking time was about 4 hours.


Veggies

• 7 medium potatoes; sliced
• 2-3 carrots; peeled & sliced

About an hour to an hour and a half from serving time, I sliced up the potatoes and the carrots and just dumped them in around the bird.

I didn’t bother with mashing the potatoes, I just served them alongside. Someone else in the family brought the mashed potatoes, anyway.

Some folks I’d been talking to mentioned that a dutch oven turkey doesn’t brown up like an oven-baked turkey. While that’s true, I found that this one did brown up quite nicely on top. I imagine that’s because of it’s proximity to the lid with coals on. I did try and keep the coals toward the edges rather than in the middle of the lid, so it wouldn’t burn.

Mark's Dutch Oven Honey Mustard Ham

12” deep dutch oven

12 coals below
14 coals above

• A medium-sized bone-in ham
• ½ cup honey
• ½ cup deli mustard
• ½ cup soy sauce
• 8-10 whole cloves

I started by putting the ham in the dutch oven. I actually had to cut it up into chunks to make it fit, and one chunk is still in the fridge. This would have been better in my 14”, but that was being used by the turkey. I also sliced diagonals back and forth across the surface of the ham, to let the seasonings seep in.

I mixed all the other ingredients in a bowl, and then just smoothed that over the surface of the ham.

Then, I put that on the coals. There was a lot of liquid in the ham, so as I baked it, from time to time, I’d open up the dutch oven, scoop up the liquid, and baste it over the meat. I cooked the ham just as long as the turkey.

Keeping the heat on was tricky. I went through a LOT of coals. You have to watch the under coals, because it’s easy to pay attention to when the coals on top are burning down, but the ones on the bottom need to be replaced, too.

Well, this was a long one, but I hope it helps you!

Tuesday, November 20, 2007

Dutch Oven Pork Chops with Dressing and Glaze

We had a whole bunch of friends coming over last Sunday night. Not being sure what to cook initially, we settled on pork chops, since that’s what we had. I did some digging around and found some good recipes, as usual, over at Byron’s. Unfortunately, as I tried it, I messed it up a bit. Since we had lots of people coming over, I spread the dressing part over three dutch ovens. Two of them for pork, and one for chicken (one of our guests is muslim, and doesn’t eat pork).

That made the ratio of stuffing to water all off, and ended up with mush. It tasted good, and all the spices in the dressing added to the meat, but it wasn’t a great texture.

So, today’s recipe is another one of those where I post how I shoulda dun it instead of how I did dun it.

Dutch Oven Pork Chops with Herbal Dressing and Orange Glaze

12” Dutch Oven

18 coals above
9 coals below

The Meat

  • 4-6 pork chops
  • salt and pepper to taste

The Dressing

  • 2 medium onions; diced
  • 3 stalks celery; diced
  • 1 cube butter, sliced (to mix more evenly)
  • 5-6 slices of bread, diced (I used sourdough rye)
  • 1 large apple; cored, peeled, and diced
  • 1/4 cup slivered almonds
  • 2 Tbs. parsley flakes
  • 1 tsp. rosemary
  • 1 tsp. paprika
  • 1 tsp. allspice
  • 2 tsp. salt
  • 2 tsp. fresh ground black pepper
  • 1/2 cup water

8” Dutch Oven

10-12 coals below

The Glaze

  • 4 oranges; juice & zest
  • ½ cup orange or pineapple juice
  • 1 1/2 cup sugar
  • 1 tsp. ground cinnamon
  • 1 tsp. salt
  • 10 whole cloves
  • 2-3 Tbs. cornstarch

I started by mixing all the dressing ingredients together in a bowl. Then, because there were a lot of people coming over, and I had a lot of meat, I put the dressing evenly on the bottom of three dutch ovens. In this case, I would recommend not doing that. Put it all in one dutch oven. Then rub the pork chops with liberal shakes of salt and coarse ground pepper, or maybe even a commercial steak seasoning. Arrange the pork chops above the dressing. It’s ok to overlap some if you have to. Then put it on the coals. Because there’s bread on the bottom, I would turn this oven frequently to avoid the hot spots.

While that was cooking, I prepared the glaze. I shaved the zest off the orange skin, and chopped it up to be a bit finer. That went right into the 8” dutch oven. I juiced the oranges right into the dutch oven, too. That was all that the original recipe called for. But it looked like not enough liquid, as I had squeezed the juice just with my bare hands, not a juicer. So, I added the pineapple juice. Then I added all the other glaze ingredients, except the cornstarch. That went on some coals right away also. I got it boiling pretty quickly, and I adjusted the coals to a pretty steady simmer.

Once it was boiling, I took the lid off to help it boil down and thicken. I added the cornstarch a little bit at a time, waiting a bit between each application to see how thick it was going to become.

The pork chops cooked about 45 minutes to an hour, and by that time the glaze was pretty nice and thick, too. Pull it off the coals. Scoop up the dressing that’s under the pork chop and serve them together. Pour some glaze on top. It is delicious!


Sunday, August 12, 2007

Dutch Oven Split Pea & Ham Soup With Biscuits

For the last few weeks, now, that ham bone has been staring at me from the back of the fridge. Covered in aluminum foil, in a colorful ceramic bowl, it mocked me. “You never finished me off!”

So, today I did. I got this basic recipe from the book “Wholly Frijoles! – The Whole Bean Cookbook” by Shayne Fisher, Golden West Publishers, then I modded it a little for Dutch Ovening.

Dutch Oven Split Pea & Ham Soup

12” deep dutch oven
10-17 briquettes below (more when getting a boil going, less when simmering). At times, when getting it boiling, I also had a few on top.

  • 1 lb bag of dried split peas
  • 1 ham bone with lots of meat left on it.
  • 8 cups water
  • 1 chopped onion
  • 2 stalks chopped celery
  • 1 diced potato
  • Generous shakes of oregano, thyme, and garlic
  • Liberally season with salt and coarse ground pepper to taste

I started out with a lot of hot coals, probably around 17+, maybe as many as 20, all underneath my deep 12” dutch oven. I put in the ham bone first. It was the one I had left over from a couple of weeks ago. When it was all done, there was a hint of the original baste from the ham in the taste. Mmmmm…

I added the peas (dry, of course), the onions and the water, and set it on the coals, covered. After about 20 minutes or so it was boiling. At that point, it was interesting to manage the heat. I had to take off enough coals to have it simmer, but not so many that it just sat there being hot. I can’t really tell you how many that was. I started with about ten, and that number changed both up and down as the coals burned and the soup cooked.

Now in the process of simmering the soup, I worked on the biscuits.

Doing the biscuits was a kind of last minute thing, since I hadn’t really planned on it, and it took me a while to find a recipe that included all the ingredients I had.

Dutch Oven Whipped Cream Biscuits

Modified from a recipe at Byron’s

12” shallow dutch oven
20 coals above
12 coals below

  • 4 cups flour
  • 2 Tbs baking powder (not heaping, but not level either)
  • 4 tsp sugar
  • 3 tsp salt
  • 3 half pint cartons of whipping cream

First, I blended all the dry ingredients into a mixing bowl, then one by one stirred in each carton of cream. When that was mixed, I did have to sprinkle on a touch of flour because it was still a little sticky.

Then, I floured my counter top and rolled it out to a ¾” thick slab. I’m not too accustomed to rolling dough, so I actually got out a tape measure and checked it. If my wife had come out and seem me doing that she would have laughed her head off. Hey, I didn’t know. Now I do. I’m not OCD. Really.

I used a small 3” cup to cut the circles. The original recipe said that if you twist the cup, it ruins the biscuits. I was careful not to twist, but I’m not sure how it would ruin them. Something about releasing the air in the dough?

Anyway, pammed (oil spray) the inside of my dutch oven, I arranged a bunch of them pretty snug in the bottom. Then I took that outside and let it raise for 10 minutes or so with the lid on.

By then, I had some more coals ready, and I set it up. Many of the coals that I put on the biscuits had come out from under the soup dutch oven. Some were nearing the end of their useful burning life. But I figured that since the biscuits would only bake for 20 minutes, tops, that would be OK.

Wrong…

We’ll come back to this.

With biscuits baking, I chopped up the potatoes and the celery for the soup. I mixed all the seasonings (generous and liberal) into that bowl, and then dumped it all in the pot. I replenished the coals, making it hot again to boil. Not long after this, I also took off the lid. I was hoping to boil down some of the liquid in the soup. That turned out to be a good idea.

Meanwhile, the biscuits weren’t cooking right. The poofed up like they were supposed to, and they looked great, but they just wouldn’t finish, and they just wouldn’t brown. I don’t know if I just never got it to the 400 degrees I needed, or if I was checking them too often, or what. Finally, they looked and felt like they were baked through, but still not even tanning up much on top. So, I took them off the bottom coals, and piled more coals on the lid. The final cooking time for the biscuits was almost an hour, including the last ten minutes with only top heat.

I’ll have to say that they ended up both delicious and a nice fluffy texture. Still, I’m not sure why it took so long.

The soup was incredible! Everyone seems to like their split pea soup to be a different consistency. I just simmered and cooked off the liquid until the potatoes were done and the peas were my kinda consistency.

I brought it in, cut the meat off the bone, and served it. I always eat too much on Sundays…

Post Script:

I was surprised to find a linkback! Someone found some interest in the ham recipe and noted it in their blog! Thanks for the contact!

Saturday, July 28, 2007

Ham in the 14” Dutch Oven

Here’s a tradition in many Mormon wards (congregations): The Dinner Group. Maybe John, over at Mormon Foodie will take it up and talk about it some day. The basic idea is that everyone that wants to signs up, and then each family is assigned to a group, usually of 3-5 total families. They get together for dinner once a month, rotating the household that hosts each time, until everyone has had a turn, and they’ve all gotten to know each other.

Then it’s all shuffled up and it starts all over again. Fellowship over food.

So, tonight was our turn to host. I immediately thought about cooking up a meal in my dutch oven, so that I could show off my mad dutchin’ skillz—I mean: humbly serve my fellow man… of course...

But what to cook that would do both?

Last Easter, I’d done a big ham in a Dr Pepper sauce, and I wanted to try that again. I looked through my records and I couldn’t find the recipe. So, I dug into the ‘net and looked all over but I couldn’t find the one I’d done. I did, however, find one at Byron’s site, for Dutch Oven Dr Pepper Pork Ribs. I thought I could mod it for the ham, so I did.

Dutch Oven Dr Pepper Ham

14” Dutch Oven
15-17 briquettes each above and below

  • 10 lb ham shank
  • 1 yellow bell pepper, diced
  • 1 large tomato, diced
  • 1 large onion, diced
  • 1 20 oz can pineapple chunks
  • 1 11 oz can mandarin oranges
  • 20-24 oz Dr Pepper (2 cans, 1 bottle, etc…)
  • 1 cup mild-medium commercial salsa
  • 1 cup brown sugar
  • 3 Tbsp minced garlic
  • Salt & Pepper (lots of coarse ground pepper, for my taste)

I started by thawing the ham overnight in the fridge. I took it out of the fridge, and put it in the sink (still in its plastic packaging) when I woke up this morning. I’d start cooking it at around 3:00.

I put the ham into the dutch oven, and cut half-inch scores criss-crossed over the top of the meat, about 2 inches apart. Then I added the pepper, the tomato, and the onion. I drained the syrup of the canned fruits into a bowl, and dumped the pineapples and oranges into the oven, too.

I mixed the fruit syrups, the Dr Pepper, the salsa, the brown sugar and the garlic in the bowl, then poured that into the dutch oven. I suppose you could dump it all into the oven at once, but the Dr Pepper helps dissolve the sugar.

Then I put it on the heat. I actually didn’t use the briquettes I recommend above, but I think that using these numbers, especially on the higher side, will yield better results. I cooked the ham for about 3 hours, and, while it was done, I think it would have been better done had the oven been a bit hotter. Every half hour, I'd open it up, and use a ladle to pour the juice and veggies/fruits on top of the ham. About every hour, I'd refresh the coals, so if you do this, make sure you've got your side fire goin' on.

(Note from Mark, posted 8/5/07: I found a chart published by Lodge that showed that the amount coals I had started with would have produced only about 300 to 315 degrees. The numbers listed above, especially on the high side, will give you 350 to 375, which will cook much better.)

Now, through all this time, I was also making my becoming-famous rolls, that I did at the cookoff. You can find that recipe here. I actually did a double batch, because we were having a lot of people coming over, and I wanted to make sure that there was enough. I did those in two 12” shallow dutch ovens.

When it was all done, I carved the ham from the oven, and served those slices on a plate. In a separate bowl, I used a straining spoon to pull up the veggies and fruits as a sweet/salty side dish.

The verdict was that everyone was thrilled with the meal. One family brought a salad, another brought dessert, and we all had a great time. And what a spread!

LinkWithin

Related Posts with Thumbnails